Difference between revisions of "Linbian Configuration"
(→CTP) |
(→UART configuration) |
||
| Line 5: | Line 5: | ||
== UART configuration == | == UART configuration == | ||
| − | By default, the ttyS0 is assigned to the Linux console. The UART transmit and receive pins are on PB9 and PB10 espectively, which are pins 8 and 10 on the 'PI BUS' GPIO header. | + | By default, the ttyS0 is assigned to the Linux console. The UART transmit and receive pins are on PB9 and PB10 espectively, which are pins 8 and 10 on the 'PI BUS' GPIO header. And the bit rate is 115200 bps. |
== Ethernet == | == Ethernet == | ||
Revision as of 07:33, 11 October 2018
Contents
linbian-config
In development
UART configuration
By default, the ttyS0 is assigned to the Linux console. The UART transmit and receive pins are on PB9 and PB10 espectively, which are pins 8 and 10 on the 'PI BUS' GPIO header. And the bit rate is 115200 bps.
Ethernet
Ethernet is enabled by default. Plug in the network cable will automatically connect to the Internet.
Wicd is used for manage wireless and wired interface.
Running Wicd in Desktop Environment
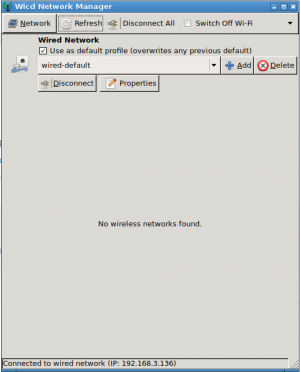
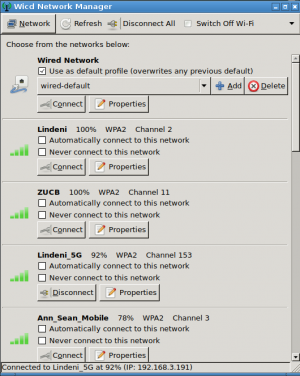
Open Wicd Network Manager from desktop. If the board is properly set up and connected, you should see a Window as follow.
Running Wicd in Text Mode
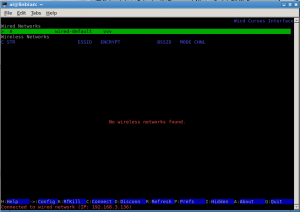
Open a Terminal from desktop. Type wicd-curses:
Manage network by keyboard.
Wi-Fi
Installing
Lindenis V5 without builtin Wi-Fi. Follow these instructions and install a module.
Add Service In Running Environment
Add configure file wifi.conf in /etc/modules-load.d, and the context of the configure file is the driver name, for example :bcmdhd
Reboot the system
Configuration
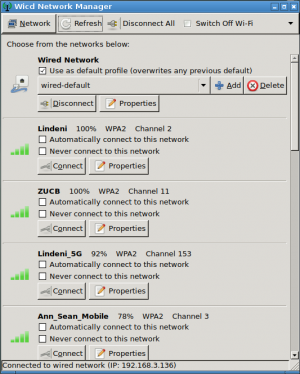
Manage Wi-Fi by Wicd (open Wicd Network Manager from desktop).
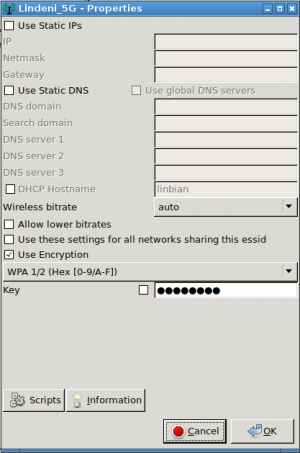
Click Properties button to set access point password.
And then click Connect button to get access.
Bluetooth
Bluetooth firmware and service are not installed by default
Add configure file
add configure file bt in "device/eagle/rootfs/etc" of sdk or "/etc" in running environment, and the context as follow:
#!/bin/bash
#
# Shell script to install Bluetooth firmware and attach BT part of
#
TTY="/dev/ttyS1"
BT_POWER_MGR_PATH=/sys/class/rfkill/rfkill0
BT_FW_PATH=/lib/firmware/rtl_bt
test -d $BT_POWER_MGR_PATH || exit 1
test -d $BT_FW_PATH || exit 1
echo "Using device $TTY for initializing Bluetooth"
#BT power initialize
echo 0 > /sys/class/rfkill/rfkill0/state
sleep 0.1
echo 1 > /sys/class/rfkill/rfkill0/state
brcm_patchram_plus --patchram /etc/firmware/BCM4345C0.hcd --no2bytes --tosleep 1000 $TTY
hciattach $TTY any
exit 0
Add Service
If you want to add service in running environment, you can use the following cmd:
insserv /etc/init.d/bt
If you want to add service in sdk, you should modify "debain/mk-rootfs-stretch.sh" as follow:
diff --git a/mk-rootfs-stretch.sh b/mk-rootfs-stretch.sh
index 75dd3ce..c46d605 100755
--- a/mk-rootfs-stretch.sh
+++ b/mk-rootfs-stretch.sh
@@ -91,6 +91,10 @@ if insserv -s | grep mpp > /dev/null ; then
insserv /etc/init.d/mpp
fi
+if insserv -s | grep bt > /dev/null ; then
+insserv /etc/init.d/bt
+fi
+
apt-get install -y bash-completion
Manage Bt devices
You can use some open source tools, for example :sudo apt-get install blueman
Camera Config
External Storage Config
Localisation
Display
Because of the limitation that there is one display engine module in V5, V5 board can not support dual-display.
The default display device of the SDK and the image on FTP server is HDMI(1080p).
If you have download the image from FTP server,and burn it into SD card or eMMC, you can switch the display device follow these steps:
Step 1 : Connect serial to control the board
Firstly, you should connect the board's UART0 to computer through a serial-USB cable so that you can send commands to the board through a PC serial software like Putty.
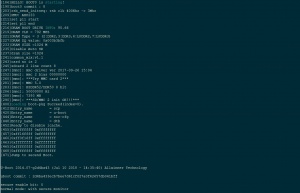
After you connected successfully, you will see the log show on the PC serial software like this:
Step 2 : Enter U-boot command mode
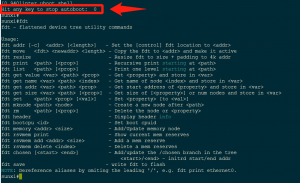
Power on and press any key within 1s when you see the message below,then you can enter u-boot command mode.
Under this mode, you can modify the kernel devices tree by FDT tools in u-boot.
Step 3 : Change display device configuration with FDT tool
Input the follow command to set display device to LCD (following this guide to connect LCD panel) or HDMI (1080p):
LCD:
fdt set boot_disp output_type <0x01>;
fdt set boot_disp output_mode <0x04>;
fdt set disp screen0_output_type <0x01>;
fdt set disp screen0_output_mode <0x04>;
fdt save;
reset;
HDMI (1080p):
fdt set boot_disp output_type <0x00>;
fdt set boot_disp output_mode <0x00>;
fdt set disp screen0_output_type <0x03>;
fdt set disp screen0_output_mode <0x0a>;
fdt save;
reset;
Step 4 : Change X11 configuration
After you change the display device, you should also tell the X11. Log in the system and modify the X11 configuration like this:
LCD:
ai@linbian:~$ cd /etc/X11/
ai@linbian:/etc/X11$ sudo ln -sf ./conf.d/xorg_lcd.conf ./xorg.conf
ai@linbian:/etc/X11$ ls -l xorg.conf
lrwxrwxrwx 1 root root 22 Oct 10 10:41 xorg.conf -> ./conf.d/xorg_lcd.conf
ai@linbian:/etc/X11$ sudo systemctl restart lightdm
HDMI (1080p):
ai@linbian:~$ cd /etc/X11/
ai@linbian:/etc/X11$ sudo ln -sf ./conf.d/xorg_hdmi.conf ./xorg.conf
ai@linbian:/etc/X11$ ls -l xorg.conf
lrwxrwxrwx 1 root root 23 Oct 10 10:46 xorg.conf -> ./conf.d/xorg_hdmi.conf
ai@linbian:/etc/X11$ sudo systemctl restart lightdm
CTP
After you connected the CTP panel to the board(see the guide), insmod its driver like this:
sudo insmod /lib/modules/4.4.55+/gt9xx_ts.ko
Notice : The CTP driver in the image on FTP server is not the latest version, you should download our SDK and compile the image by yourself to confirm CTP work well.
