Difference between revisions of "Lindenis V5"
(→Datasheet) |
(→Documents) |
||
| (One intermediate revision by the same user not shown) | |||
| Line 175: | Line 175: | ||
** [http://files.lindeni.org/lindenis-v5/datasheets/V5%c2%a0V100%c2%a0Professional%c2%a0HD%c2%a0IP%c2%a0Camera%c2%a0SoC_V1.1.pdf Allwinner V5 V100 SoC Datasheet (English version)] | ** [http://files.lindeni.org/lindenis-v5/datasheets/V5%c2%a0V100%c2%a0Professional%c2%a0HD%c2%a0IP%c2%a0Camera%c2%a0SoC_V1.1.pdf Allwinner V5 V100 SoC Datasheet (English version)] | ||
** [http://files.lindeni.org/lindenis-v5/datasheets/V5%c2%a0V100%c2%a0Professional%c2%a0HD%c2%a0IP%c2%a0Camera%c2%a0SoC_V1.1.pdf Allwinner V5 V100 SoC Datasheet (Chinese version)] | ** [http://files.lindeni.org/lindenis-v5/datasheets/V5%c2%a0V100%c2%a0Professional%c2%a0HD%c2%a0IP%c2%a0Camera%c2%a0SoC_V1.1.pdf Allwinner V5 V100 SoC Datasheet (Chinese version)] | ||
| − | If you access the file | + | If you cannot access the file, please send an e-mail to <b>services@lindeni.com</b>. |
* X-Powers AXP233 Information | * X-Powers AXP233 Information | ||
** [http://files.lindeni.org/lindenis-v5/datasheets/AXP233_Datasheet_V1.0_en.pdf AXP233 Datasheet (English version)] | ** [http://files.lindeni.org/lindenis-v5/datasheets/AXP233_Datasheet_V1.0_en.pdf AXP233 Datasheet (English version)] | ||
** [http://files.lindeni.org/lindenis-v5/datasheets/AXP233_Datasheet_V1.0.pdf AXP233 Datasheet (Chinese version)] | ** [http://files.lindeni.org/lindenis-v5/datasheets/AXP233_Datasheet_V1.0.pdf AXP233 Datasheet (Chinese version)] | ||
** [http://files.lindeni.org/lindenis-v5/datasheets/AXP233%20User%20Manuale_V1.0.pdf AXP233 User Manual (Chinese version)] | ** [http://files.lindeni.org/lindenis-v5/datasheets/AXP233%20User%20Manuale_V1.0.pdf AXP233 User Manual (Chinese version)] | ||
| − | If you access the file | + | If you cannot access the file, please send an e-mail to <b>services@lindeni.com</b>. |
* [http://files.lindeni.org/lindenis-v5/datasheets/K4B4G1646E-BYK0.pdf Samsung DDR3L Datasheet] | * [http://files.lindeni.org/lindenis-v5/datasheets/K4B4G1646E-BYK0.pdf Samsung DDR3L Datasheet] | ||
* [http://files.lindeni.org/lindenis-v5/datasheets/OP03-JS1158%20FORESEE_eMMC_NCEMASD9-08G%20SPEC%20A0%2020150701.pdf Foresee eMMC Datasheet] | * [http://files.lindeni.org/lindenis-v5/datasheets/OP03-JS1158%20FORESEE_eMMC_NCEMASD9-08G%20SPEC%20A0%2020150701.pdf Foresee eMMC Datasheet] | ||
| Line 255: | Line 255: | ||
==== Documents ==== | ==== Documents ==== | ||
| − | + | * [http://files.lindeni.org/lindenis-v5/documents/ Allwinner official documents] | |
| − | + | If you cannot access the files, please send an e-mail to <b>services@lindeni.com</b> . | |
: ''For the sample mentioned in the documentation, please visit [https://github.com/lindenis-org/mpp_sample mpp_sample].'' | : ''For the sample mentioned in the documentation, please visit [https://github.com/lindenis-org/mpp_sample mpp_sample].'' | ||
Latest revision as of 01:52, 16 September 2022
Contents
- 1 Key Features
- 2 Target Applications
- 3 Accessories Step-by-Step Guides
- 4 Hardware Specification
- 5 Datasheet
- 6 SDK
- 6.1 Overview
- 6.2 Download and Build
- 6.3 Linbain OS
Key Features
- AI video analysis with hardware acceleration
- Face detection and regconition
- Intelligent motion detection
- Human counting
- Vehicle license plate recognition
- Binocular depth of field (DOF) image
- 4K Smart encoding
- H.264 BP/MP/HP, H.265 MP, MJPEG/JPEG baseline encoding
- I/P Frame, Smart P frame reference
- Real-time multi stream H.264/H2.65 encoding, 3840x2160@30fps+VGA@30fps+3840x2160@1fps snapshot
- Supports CBR and VBR mode, 2kbps~100Mbps
- H265/H264/MJEPG decoding, up to 4K@30fps
- 360 Panoramic Stitching with Hardware Acceleration
- Lens distortion correction and fisheye correction
- Binocular stitching (360° panorama,180° wide angle)
- Professional Image Effects
- Dual individual ISP, ISP1 supports 4244x3168, ISP2 supports 3264x2448
- Adjustable 3A functions (AE, AWB, and AF)
- Highlight compensation, backlight compensation, gamma correction, and color enhancement
- Supports defect pixel correction, 2D/3D denoising
- Supports sensor built-in WDR, 2F-Frame/Line base WDR, Local Tone mapping
- Various interfaces
- Supports 2 x MIPI-CSI2, 4 x AHD, 1 x DVP input
- Supports BT1120 input/output
- Supports Line-in/Line-out
- Supports Dual-channel differential MIC inputs
- Supports WiFi 802.11ac / BT4.2 (option)
- Software Support
- Linux kernel 4.4
- Linbian (Based on Debian 9)
- OpenCV
- Compute Library
- Tensorflow
- GStreamer with hardware acceleration
Target Applications
You can use it for the following product engineering validation test:
- SDV
- Smart IPC
- Car DVR
- Smart Camera
- 3D/VR Camera
- Panoramic Camera
- VLPR device
- Face recognition device
Or you can use it to build:
- A computer
- A streaming server
Pretty much anything else.
Accessories Step-by-Step Guides
Power Supply
HDMI Cable
Enclosures
Camera module
LCD
Flash module
WiFi and Bluetooth module
Hardware Specification
SoC and Memory
CPU Architecture
- Quad-core ARM Cortex-A7 Processor@1512Mhz
- A power-efficient ARM v7 architecture
- Support NEON Advanced SIMD (Single Instruction Multiple Data) instruction for acceleration of media and signal processing function
- VFPv4 Floating Point Unit
- Supports dynamic frequency scaling
- 32KB L1 Instruction cache and 32KB L1 Data cache
- 512KB L2 cache
VPU Architecture
- Video Encoding H.265/H.264 4K@30fps
- Video Decoding H.265/H.264 4K@30fps
IPU Architecture
- Dual ISP 13M@30fps + 8M@30fps
- Fisheye
- Stitching
AIE Architecture
- Built-in with intelligent analytics acceleration engine.
- Supports motion detection, perimeter defense, video diagnosis, face detection, flow statistics.
- Supports binocular depth map.
System Memory
- RAM Memory: 1GB
- Storage Memory: Lindenis V5 do not have built-in flash
Board Features
Video Out
- HDMI 1.4 Type A, up to 4K@30FPS
- MIPI-DSI, 4 lanes, up to 1080P
Video In
- 2 x MIPI-CSI2 - Camera interface, 4 lanes per channel
Audio
- 3.5mm Line in / out
- 2 x mic
Network
- 10/100/1000Mbps Ethernet
- WiFi with Bluetooth (optional)
Storage
- MicroSD Card bootable, support SDHC and SDXC, storage up to 256GB
- USB2.0 Host port x 4
Expansion Ports
- Board to Board connector - Flash module interface
- Wi-Fi/BT Module Header - SDIO 3.0 and UART, pitch 2.0mm
- 2x20 pins "PI BUS" GPIO Header, pitch 2.54mm, compatible with Raspberry Pi B+ J8 GPIO Header
- 2x3 pins GPIO Header, pitch 2.54mm
- 2x7 pins "I2S" GPIO Header, pitch 2.54mm
- VBAT - Battery connector, pitch 2.0mm
- 2x28 pins "CSI0" and "CSI1" GPIO Header, pitch 1.27mm
Board Information
- Board Dimensions: 130mm x 85mm
- Input Power: 5V@2A micro USB connector, 3.7V Li-Ion battery connector
- Power consumption
- Lindenis V5 connector layout
- Lindenis V5 pinout
- Lindenis V5 PCB Dimensions
- Lindenis V5 PCB place map
Board Schematic
Board Certifications
Datasheet
- Allwinner V5 V100 SoC Information
If you cannot access the file, please send an e-mail to services@lindeni.com.
- X-Powers AXP233 Information
If you cannot access the file, please send an e-mail to services@lindeni.com.
- Samsung DDR3L Datasheet
- Foresee eMMC Datasheet
- AP6255 Module Spec Sheet
- Ethernet PHY Datasheet
- LCD Module Specification
- GOODiX GT911 5-Point Capacitive Touch Controller Datasheet
- USB 2.0 Hub Controller
SDK
Overview
Features
- Supports Debian 9
- Linux kernel 4.4 (official version)
- U-Boot 2014.07
- ARM GCC based cross toolchain
- Integrated build system
Main Components
File system
Ext4 file system is used as default root file system. This includes all the files, libraries, drivers, nodes and others entries, that will be mounted in the target board when Linux finishes to boot up.
For Linbian OS, the rootfs created from a Debian base system (only support armel architectures currently, armhf architectures will be supported in the near future). It's easy to install packages via apt-get.
Kernel
This includes all drivers.
Bootloader
The bootloader loads kernel.
Toolchain
Used to build kernel, libraries and applications for the target hardware.
Layout
├── build                         # Build scripts
├── build.sh                      # Top level build script
├── debian                        # Debian based rootfs build scripts
│   ├── overlay                  # Overlay of system
│   └── stretch-alip.tar.gz      # A Debian basic root file system
├── device                        # Platforms relative files
│   ├── cuckoo
│   ├── eagle                    # Allwinner V5 platform
│   │   ├── boards              # Board's relative files
│   │   │   ├── allwinner-dvb  # Allwinner dvb
│   │   │   └── lindeni-v5     # Lindenis V5 SBC
│   │   │       ├── configs    # Lindenis V5 SBC board configurations, sys_config.fex etc.
│   │   │       └── rootfs     # Lindenis V5 SBC board rootfs overlay
│   │   ├── bootloader          # Allwinner V5 Bootloader relative files
│   │   ├── configs             # Allwinner V5 platform configurations, env.cfg, sys_partition.fex, etc.
│   │   └── rootfs              # Allwinner V5 platform rootfs overlay
│   └── petrel
├── kernel                       # Kernel source code
├── out                          # Building output
├── tools                        # Tools for building and packing
│   ├── build
│   │   └── toolchain           # Cross toolchain
└── u-boot                       # U-Boot source code
- Rootfs overlay
- The build scripts copy overlay as follows:
- debian/overlay
- device/PLATFORM/rootfs
- device/PLATFORM/boards/BOARD/rootfs
Documents
If you cannot access the files, please send an e-mail to services@lindeni.com .
- For the sample mentioned in the documentation, please visit mpp_sample.
Download and Build
System requirements
Listed below are the recommended requirements for downloading and building the SDK:
- CPU: x86_64 or better family processor
- Memory: 8GB or higher
- Disk: 10GB free hard disk space
- OS: Ubuntu 14.04 (tested) or higher
- Network: internet connection
Linux host setup
Ubuntu 14.04
HINT: later version should also work.
Install prerequisites
$ sudo dpkg --add-architecture i386
$ sudo apt-get update
$ sudo apt-get install git git-core u-boot-tools qemu qemu-user-static debootstrap lib32z1 lib32ncurses5 libc6:i386 libstdc++6:i386 gawk
- dpkg --add-architecture i386: support 32bit architecture
- apt-get update: retrieve new lists of packages
- git git-core: manage source code
- u-boot-tools: build kernel image
- qemu qemu-user-static: emulator for arm on host CPU
- debootstrap: for installing a Debian base system
- lib32z1 lib32ncurses5 libc6:i386 libstdc++6:i386: for running 32bit tools
- gawk: GNU Awk
Sudo without password
$ sudo visudo
Add this line at the end (change “james” to your username):
james ALL=(ALL) NOPASSWD: ALL
Ctrl-X to leave, save your changes, and you're done!
Downloading
\--------> 国内开发者全套资料云盘下载,提取码:ldv5 <--------\
SDK
The SDK is available on github.
We use Repo manage Git repositories. Clone Repo from android Git repositories or other mirrors and install it.
Chinese developers can install Repo follow these steps:
$ git clone http://mirrors.ustc.edu.cn/aosp/git-repo.git ~/.bin/repo
$ echo "export PATH=~/.bin/repo:$PATH" >> ~/.bashrc
$ source ~/.bashrc
For Lindenis V5, download the SDK via:
$ repo init -u https://github.com/lindenis-org/manifest.git -b v5
$ repo sync
The Download time depends on your network connection speed. After finish the download, you should get below directories:
build build.sh debian device kernel tools u-boot
Start a branch for local workspace:
$ repo start v5 --all
Before building the source, you have to download a basic rootfs and toolchains.
Basic rootfs
Download the basic rootfs from FTP server with user 'ftp' (password: lindeni) and store to debian directory.
Toolchain
Download the toolchain from FTP server with user 'ftp' (password: lindeni) and store to tools/build/toolchain directory (create directory if not exist).
Base Rootfs and Toolchain for Chinese Developer
如国内开发者无法正常访问FTP服务器,可以通过百度云盘下载:地址| 提取码:ldv5
Building
Setup env
For Lindenis V5 SBC:
$ source build/envsetup.sh
All available platforms:
   0. eagle(Allwinner-V5,sun8iw12p1,arm)
   1. petrel(Allwinner-H3,sun8iw7p1,arm)
   2. cuckoo(Allwinner-V3,sun8iw8p1,arm)
Choice: 0
All available OS:
   0. buildroot
   1. debian
Choice: 1
   0. allwinner-dvb
   1. lindeni-v5
Choice: 1
Build source
- Build kernel and rootfs
$ ./build.sh
Now you can build the OS image. You can also build component separately for debugging as follow.
- Build kernel only
$ ./build/mk-kernel.sh
- Build rootfs only (debian)
$ ./build/mk-debian.sh
- Build U-Boot
$ ./build/mk-u-boot.sh
Build image
For MicroSD Card image:
$ ./build.sh flat-fw
For eMMC image:
$ ./build.sh pack
Installation
Linbain OS
Overview
Linbian is the recommended operating system for normal use on Lindenis V5.
Linbian is a free operating system based on Debian, optimised for the Lindenis V5 hardware. You can use it to build some creativity app, or use it for engineering validation test. Feel free to coding and compiling on it directly, no need to cross build anymore.
Linbian is maintained by Lindenis Tech. Ltd.. The SDK is hosted on GitHub.
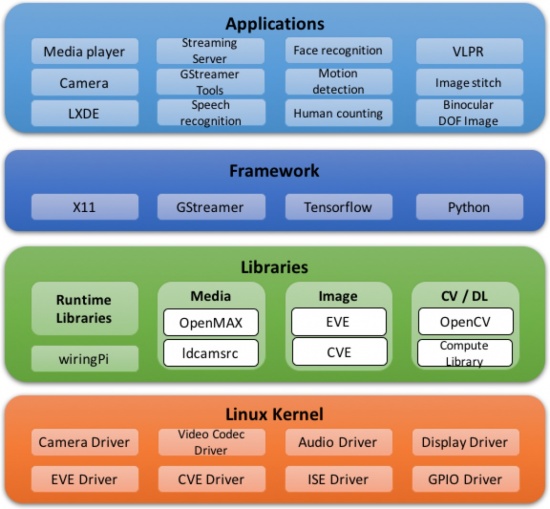
Applications
- LXDE: Default desktop environment.
- Media player: is a GStreamer based video play, which can be run standalone on the desktop.
- Camera: is a GStreamer based camera app, which can be run standalone on the desktop.
- Streaming Server: is a GStreamer based RTSP server.
- GStreamer Tools: gst-inspect-1.0, gst-launch-1.0
- Speech recognition: is a speech recognition demo.
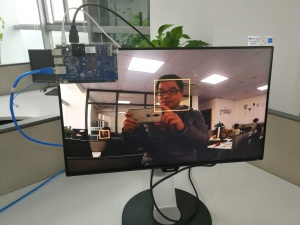
- Face recognition: is a face recognition demo. Capture video with ldcamsrc, detect face with EVE.
- Motion detection: is a intelligent motion detection demo.
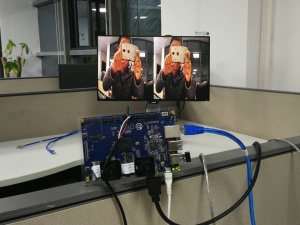
- Human counting: is a human counting demo.
- VLPR: is a vehicle license plate recognition demo.
- Image stitch: is realtime image stitch demo.
- Binocular DOF Image
Framewrok
- X11: is an open source implementation of the X Window System.
- GStreamer: is an open source media framework. Running on Lindenis V5 with hardware acceleration.
- Tensorflow: is an open source machine learning framework.
- Python: is a general purpose programming language that is easy to use.
Libraries
- OpenMAX: Video decoder / encoder plugin for GStreamer.
- ldcamsrc: Lindenis camera source plugin for GStreamer.
- EVE: is a embedded vision engine.
- CVE: is a compute vision engine.
- OpenCV
- Compute Library: a software library for computer vision and machine learning.
- wiringPi: is a PIN based GPIO access library written in C for Lindenis V5.
Linux Kernel
- Official version: 4.4
Setup
What you Need
You will need the following to get started with using your Lindenis V5 board:
- Windows / Linux PC or MAC with a SD Card Reader connected to the Internet.
- Power Supply (PSU) and a micro usb cable. Please make sure to use a PSU rated at +5V@2A.
- MicroSD card (4GB or higher capacity) rated 'class 10' or better.
- Camera module (recommended).
- HDMI cable (optional).
- Network Cable connected to the Internet (optional).
- Input device(s) such as: keyboard, mouse, etc.
Installation
Download the image
Download the image from FTP server with user 'ftp' (password: lindeni).
For China mainland users, you can also download the images from Baidu Netdisk. The key code is "vcss".
Note that there are two type images here. Make sure you download the right one.
- For-SDCard: the image can be written to the SD card
- For-eMMC: the image can be written to the eMMC (you should purchase a eMMC module firstly)
Writing an image to the SD card
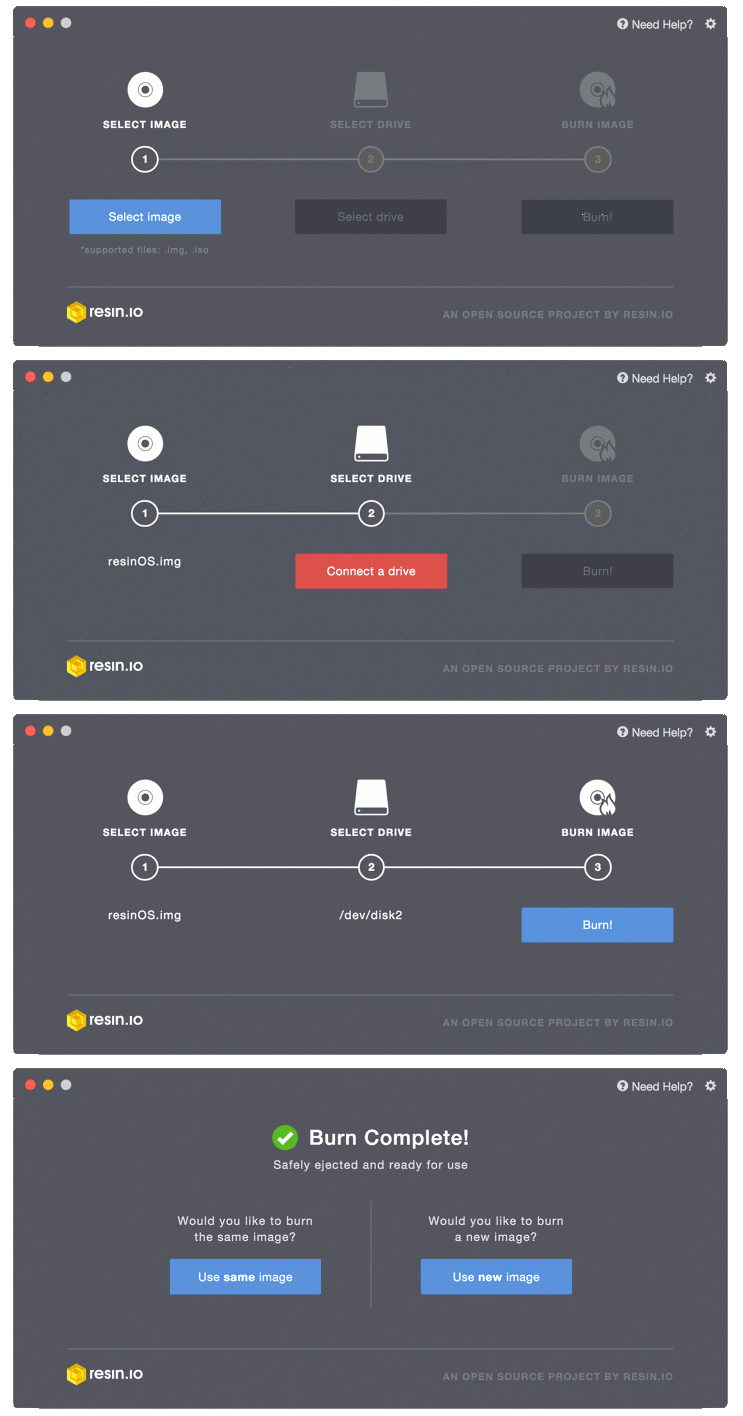
Writing the image to MicroSD Card by Etcher is recommended.
- Using a computer with an MicroSD Card reader.
- Visit etcher.io and download and install the Etcher SD card image utility.
- Run Etcher and select the image you downloaded.
- Select the SD card drive. Note that the software may have already selected the right drive.
- Finally, click Flash to transfer the image to the MicroSD Card. You'll see a progress bar that tells you how much is left to do. Once complete, the utility will automatically eject/unmount the SD card so it's safe to remove it from the computer.
Now that you have an operating system. You can slot your SD card into your SBC and connect the power. Then you will boot directly to the desktop environment.
Troubleshooting
Usage Guide
Terminal
On Linbian OS, the default terminal application is LXTerminal.
You can open it from Application Menu -> System Tools.
Camera Module
download source code from github
- ldcam developed base on gstreamer
compile
- compile on v5 board===
- you can execute "make" directly
- compile on your own env
- you should create the Makefile by yourself
user commd
- you can use "./ldcam -?" or "./ldcam --help" to get the cmd instructions
Webcams
Gstreamer
Camera source
- lindeniv4l2src: Video (video4linux2) Source
Use for CSI Camera
Example:
sudo gst-launch-1.0 lindeniv4l2src device=/dev/video1 ! video/x-raw,width=1920,height=1080,format=I420 ! videoconvert ! sunxifbsink video-memory=24
Omx hardware H.264 decoder and encoder
- omxh264dec: OpenMAX H.264 Video Decoder
Example:
sudo gst-launch-1.0 filesrc location=1c.mp4 ! qtdemux name=demux demux.video_0 ! queue ! h264parse ! omxh264dec ! videoconvert ! sunxifbsink
- omxh264videoenc: OpenMAX H.264 Video Encoder
Example:
sudo gst-launch-1.0 lindeniv4l2src device=/dev/video1 ! video/x-raw,width=1920,height=1080,format=I420 ! videoconvert ! omxh264videoenc target-bitrate=5000000 ! mpegtsmux ! filesink location=1.ts
Display sink
- sunxifbsink: Accelerated console framebuffer video sink for sunxi-based devices
Example:
sudo gst-launch-1.0 -v videotestsrc pattern=ball name=left ! sunxifbsink
Play Video
Play Audio
Python
GPIO
MPP
MPP is the media process platform of Allwinner V5, including following components.
- system control, API family: AW_MPI_SYS
- This component deal with the media hardware initialization, other components initialization and component state management and etc.
- video input, API family: AW_MPI_VI
- video output, API family: AW_MPI_VO
- image stitch engine, API family: AW_MPI_ISE
- video encode, API family: AW_MPI_VENC
- video decode, API family: AW_MPI_VDEC
- mux, API family: AW_MPI_MUX
- demux, API family: AW_MPI_DEMUX
- audio input, API family: AW_MPI_AI
- audio output, API family: AW_MPI_AO
- audio endode, API family: AW_MPI_AENC
- audio output, API family: AW_MPI_AOUT
- Region, API family: AW_MPI_RGN
Allwinner official documents
Please send an e-mail to services@lindeni.com for application.
Samples
Please refer to Demo programs.
Demo programs
Allwinner release a series of MPP samples. You can download from Github.
$ git clone https://github.com/lindenis-org/mpp_sample ~/mpp_sample
国内开发者建议从Gitee上下载:
$ git clone https://gitee.com/lindenis/mpp_sample.git ~/mpp_sample
After downloading, You will get the following directory.
app/
Makefile.param
README.md
sample_adec/
sample_aenc/
sample_ai/
......
There is a instruction name readme.txt in every sample, you should read the document first when you running the sample
And then you can know how to config the sample, some sample needed be configured,maybe config file is sample_xxx.conf.
app/ includes a set of MPP samples with a command line based menu. sample_xxx/ is a separate sample of the scene. Root privileges is required when run these sample. e.g.
$ sudo ./app/release/app_mpp_sample

***************************************************************
  1 : vi+(venc+rtsp)+vo
  2 : vi+(venc+rtsp)
  3 : vi+vo
  4 : vi+ise+(venc+rtsp)+vo
  5 : [vi+venc+vo]+[ai+aenc+ao]+rtsp
  6 : vi->yuv+venc+rtsp
  7 : vi+venc+mux
  8 : vi+(venc+mux)+vo
  9 : demux+vdec+vo
 10 : ai+aenc+mux+ao
 11 : demux+adec+ao
 12 : Quit
***************************************************************
 Please choice 1~12 num:
RTSP
Location
app_mpp_sample
Build
$ cd ~/mpp_sample/app
$ make
Running
$ sudo ./release/app_mpp_sample
There will shows the following message when you execultive the cmd, and type the num according the menu.
***************************************************************
  1 : vi+(venc+rtsp)+vo
  2 : vi+(venc+rtsp)
  3 : vi+vo
  4 : vi+ise+(venc+rtsp)+vo
  5 : [vi+venc+vo]+[ai+aenc+ao]+rtsp
  6 : vi->yuv+venc+rtsp
  7 : vi+venc+mux
  8 : vi+(venc+mux)+vo
  9 : demux+vdec+vo
 10 : ai+aenc+mux+ao
 11 : demux+adec+ao
 12 : Quit
***************************************************************
 Please choice 1~12 num: 1

***************************************************************
  1 : Set VI+VENC scene     (Resolution,    default:4K@25fps+720P@25fps)
  2 : Set VENC Payload Type (H264/H265,     default:H264)
  3 : Set VENC RC Mode      (CBR/VBR/FIXQP, default:CBR)
  4 : Set VENC Profile      (BL/MP/HP,      default:Main Profile)
  5 : Set VENC rotate       (0/90/180/270,  default:rotate_0)
  6 : Save confige and run this sample
***************************************************************
 Please choice 1~6 num: 1

 ***************** Choice VI+VENC scene **************************
 [0]:VI_4K@30fps + VENC(4K@30fps+VGA@30fps)
 [1]:VI_4K@25fps + VENC(4K@25fps+720P@25fps) [default]
 [2]:VI_2K@30fps + VENC(2K@30fps+720P@30fps)
 [3]:VI_1080P@30fps + VENC(1080P@30fps+720P@30fps)
 [4]:VI_2880x2160@30fps + VENC(2880x2160@30fps+1080P@30fps)
 [5]:VI_2592x1944@30fps + VENC(2592x1944@30fps+1080P@30fps)
 Please choose VI+VENC scene ID 0~3 or (q-Quit): 1

 ***************************************************************
  1 : Set VI+VENC scene     (Resolution,    default:4K@25fps+720P@25fps)
  2 : Set VENC Payload Type (H264/H265,     default:H264)
  3 : Set VENC RC Mode      (CBR/VBR/FIXQP, default:CBR)
  4 : Set VENC Profile      (BL/MP/HP,      default:Main Profile)
  5 : Set VENC rotate       (0/90/180/270,  default:rotate_0)
  6 : Save confige and run this sample
***************************************************************
 Please choice 1~6 num: 6
Test result
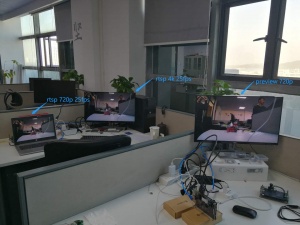
- You can see that the two remote device can get the data at the same time
- There are two output data channel, you can get 720p from channel1 and 4K data from channel0
- Tt also can be viewed by mobile phone, a simple IPC mode.
Dual Camera
Location
sample_virvi2ise2vo
Build
$ cd ~/mpp_sample/sample_virvi2ise2vo
$ make
Running
$ sudo ./sample_virvi2ise2vo -path sample_virvi2ise2vo.conf
Test result
- Two ISP can work at the same time
- And each one can send 4K 30fps data out when you preview the picture
- Device can support 4K 15fps encode when two ISP work at the same time
Face detection
Face detection based on EVE.
Location
sample_face_detect
Build
$ cd ~/mpp_sample/sample_face_detect
$ make
Running
$ sudo ./sample_face_detect
The picture of face crop and store at ./pic directory when detected.
Test result
- Support face detect which the data source minmum pixels is 20
- Support face detection and tracing at the same time, the maximum number is 16
- The maximum detect face number is 128
Motion detection
Motion detection based on CVE.
Location
sample_AILib/sample_vi2MOD
Build
$ cd ~/mpp_sample/sample_AILib/sample_vi2MOD
$ make
Running
$ sudo ./sample_vi2MOD -path sample_vi2MOD.conf
The information of detected target was stored at ./DTCAResult.bin .
Human counting
Hunman counting based on CVE.
Location
sample_AILib/sample_vi2HCNT
Build
$ cd ~/mpp_sample/sample_AILib/sample_vi2HCNT
$ make
Running
$ sudo ./sample_vi2HCNT -path sample_vi2HCNT.conf
The information of detected target was stored at ./HCNTResult.bin .
VLPR
VLPR based on CVE.
Location
sample_AILib/sample_vi2VLPR
Build
$ cd ~/mpp_sample/sample_AILib/sample_vi2VLPR
$ make
Running
$ sudo ./sample_vi2VLPR -path sample_vi2VLPR.conf
The information of detected vehicle license plate was stored at ./VLPRResult.bin .
Binocular depth information image
BDII based on CVE.
Location
sample_AILib/sample_BDII
Build
$ cd ~/mpp_sample/sample_AILib/sample_vi2BDII
$ make
Running
$ sudo ./sample_vi2BDII -path sample_vi2BDII.conf
The output is a 8bit-gray-scale picture, stored at ./BDIIResult.bin .
OpenCV
sample_virvi2opencv2vo
OpenCV version 4.0.1
This is a simple sample for motion detection via opencv.
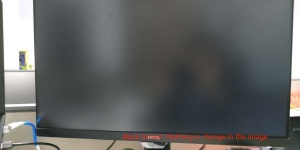
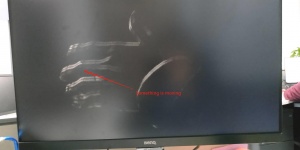
When running this sample, if the picture captured by the camera is still, it will be black screen. If there is a moving object, the outline of the moving object will be displayed. When the mean difference of the real-time image frame difference is greater than the sensitivity value, the following printing appears, indicating that there is a significant change in the image or something is moving.
Something is moving! mean_diff:10
Something is moving! mean_diff:70
Something is moving! mean_diff:94
Something is moving! mean_diff:120
Something is moving! mean_diff:362
Something is moving! mean_diff:34
Something is moving! mean_diff:30
Location
sample_virvi2opencv2vo
Build
$ cd ~/mpp_sample/sample_virvi2opencv2vo
$ make
Running
$ sudo ./sample_virvi2opencv2vo -path ./sample_virvi2opencv2vo.conf
You can change the conf in the sample_virvi2opencv2vo.conf
- auto_test_count : test times
- get_frame_count : number of frame in one time test
- dev number: video node
- src_width * src_height:720p/1080p;
- src_frame_rate: 25
- pic_format is nv21
- enable_disp_color: 0 disable, 1 enable
- moving_detect_sensitivity >=1 , 1 is most sensitive
Test result
Configuration
linbian-config
In development
UART configuration
By default, the ttyS0 is assigned to the Linux console. The UART transmit and receive pins are on PB9 and PB10 espectively, which are pins 8 and 10 on the 'PI BUS' GPIO header. And the bit rate is 115200 bps.
Ethernet
Ethernet is enabled by default. Plug in the network cable will automatically connect to the Internet.
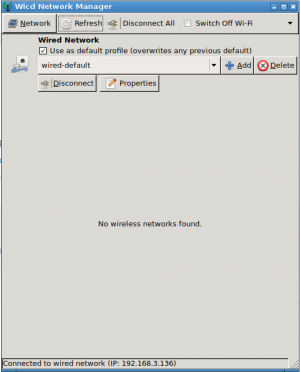
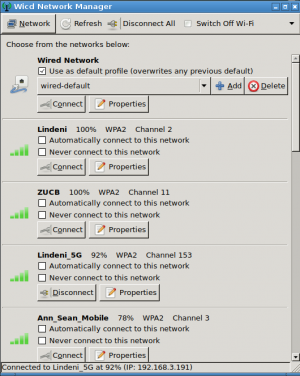
Wicd is used for manage wireless and wired interface.
Running Wicd in Desktop Environment
Open Wicd Network Manager from desktop. If the board is properly set up and connected, you should see a Window as follow.
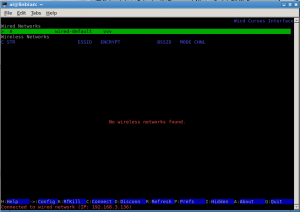
Running Wicd in Text Mode
Open a Terminal from desktop. Type wicd-curses:
Manage network by keyboard.
Wi-Fi
Installing
Lindenis V5 without builtin Wi-Fi. Follow these instructions and install a module.
Add Service In Running Environment
Add configure file wifi.conf in /etc/modules-load.d, and the context of the configure file is the driver name, for example :bcmdhd
Reboot the system
Configuration
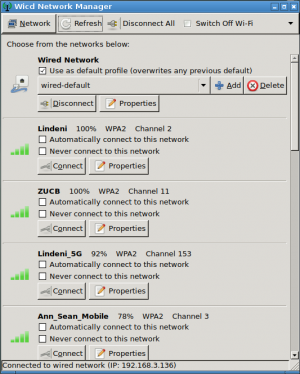
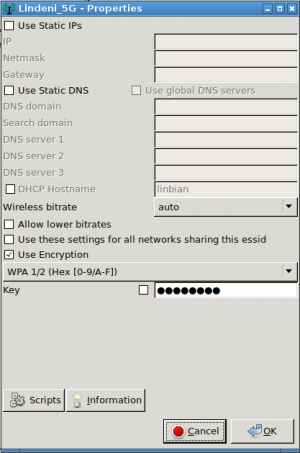
Manage Wi-Fi by Wicd (open Wicd Network Manager from desktop).
Click Properties button to set access point password.
And then click Connect button to get access.
Bluetooth
Bluetooth firmware and service are not installed by default Add configure file add configure file bt_server in "device/eagle/rootfs/etc" of sdk or "/etc" in running environment, and the context as follow:
#!/bin/bash
#
# Shell script to install Bluetooth firmware and attach BT part of
#
TTY="/dev/ttyS1"
BT_POWER_MGR_PATH=/sys/class/rfkill/rfkill0
BT_FW_PATH=/lib/firmware/rtl_bt
test -d $BT_POWER_MGR_PATH || exit 1
test -d $BT_FW_PATH || exit 1
echo "Using device $TTY for initializing Bluetooth"
#BT power initialize
echo 0 > /sys/class/rfkill/rfkill0/state
sleep 0.1
echo 1 > /sys/class/rfkill/rfkill0/state
brcm_patchram_plus --patchram /etc/firmware/BCM4345C0.hcd --no2bytes --tosleep 1000 $TTY
hciattach $TTY any
exit 0
Add Service If you want to add service in running environment, you can use the following cmd:
insserv /etc/init.d/bt
If you want to add service in sdk, you should modify "debain/mk-rootfs-stretch.sh" as follow:
diff --git a/mk-rootfs-stretch.sh b/mk-rootfs-stretch.sh
index 75dd3ce..c46d605 100755
--- a/mk-rootfs-stretch.sh
+++ b/mk-rootfs-stretch.sh
@@ -91,6 +91,10 @@ if insserv -s | grep mpp > /dev/null ; then
insserv /etc/init.d/mpp
fi
+if insserv -s | grep bt > /dev/null ; then
+insserv /etc/init.d/bt
+fi
+
apt-get install -y bash-completion
Manage Bt devices
You can use some open source tools, such as blueman.
sudo apt-get install blueman
Camera Config
Sys_config.fex config
See the 13 chapter page 37 to page 52 sys_config guide
Kernel menuconfig
Device Drivers  --->
	<*> Multimedia support  --->
           [*]   V4L platform devices  --->
                 [*]       imx317 platform select  --->
                       --- imx317 platform select
                       [*]   select IPC platform config otherwise SDV platform
                       <M>   imx317_mipi sensor driver
the imx317 sensor driver code
kernel/drivers/media/platform/sunxi-vin/modules/sensor/imx317_mipi.c
if you want to support a new sensor, you can add the driver code in this path, and modify the Makefile and Kconfig like imx317. Of course you should config the sys_config.fex first.
Insmod the sensor module
1.cp the driver ko to debian/target/lib/modules/4.4.55+/
2.replace the imx317_mipi with the new sensor ko's name in this file
device/eagle/rootfs/etc/modules-load.d/mpp.conf
3.build the sdk
User Interfaces
1.Use the MPP interfaces. see the MPP Interface Usage page 20-53,
The demo code is here sample_virvi2vo
2.Use the /dev/videoX directly, you can see the demo in Camera Driver Guide
ISP Tuning
Allwinner V5 ISP Tuning Tool
- Download and extract to a local folder (note: Windows only).
- Upgrade your Linbian OS to 20181016 or later.
- Please refer to the documents in docs folder for usage.
Display Config
Because of the limitation that there is one display engine module in V5, V5 board can not support dual-display.
The default display device of the SDK and the image on FTP server is HDMI(1080p).
If you have download the image from FTP server, and burn it into SD card or eMMC, you can switch the display device follow these steps:
Connect serial to control the board
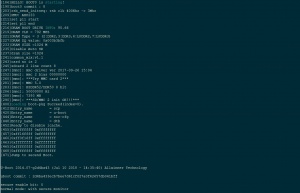
Firstly, you should connect the board's UART0 to computer through a serial-USB cable so that you can send commands to the board through a PC serial software like Putty.
After you connected successfully, you will see the log show on the PC serial software like this:
Enter U-boot command mode
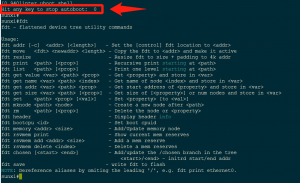
Power on and press any key within 1s when you see the message below, then you can enter u-boot command mode.
Under this mode, you can modify the kernel devices tree by FDT tools in u-boot.
Change display device configuration with FDT tool
Input the follow command to set display device to LCD (following this guide to connect LCD panel) or HDMI (1080p):
LCD:
fdt set boot_disp output_type <0x01>;
fdt set boot_disp output_mode <0x04>;
fdt set disp screen0_output_type <0x01>;
fdt set disp screen0_output_mode <0x04>;
fdt save;
reset;
HDMI (1080p):
fdt set boot_disp output_type <0x00>;
fdt set boot_disp output_mode <0x00>;
fdt set disp screen0_output_type <0x03>;
fdt set disp screen0_output_mode <0x0a>;
fdt save;
reset;
Change X11 configuration
After you change the display device, you should also tell the X11. Log in the system and modify the X11 configuration like this:
LCD:
ai@linbian:~$ cd /etc/X11/
ai@linbian:/etc/X11$ sudo ln -sf ./conf.d/xorg_lcd.conf ./xorg.conf
ai@linbian:/etc/X11$ ls -l xorg.conf
lrwxrwxrwx 1 root root 22 Oct 10 10:41 xorg.conf -> ./conf.d/xorg_lcd.conf
ai@linbian:/etc/X11$ sudo systemctl restart lightdm
HDMI (1080p):
ai@linbian:~$ cd /etc/X11/
ai@linbian:/etc/X11$ sudo ln -sf ./conf.d/xorg_hdmi.conf ./xorg.conf
ai@linbian:/etc/X11$ ls -l xorg.conf
lrwxrwxrwx 1 root root 23 Oct 10 10:46 xorg.conf -> ./conf.d/xorg_hdmi.conf
ai@linbian:/etc/X11$ sudo systemctl restart lightdm
CTP Config
After you connected the CTP panel to the board (see the guide), insmod its driver like this:
sudo insmod /lib/modules/4.4.55+/gt9xx_ts.ko
Notice : The CTP driver in the image on FTP server is not the latest version, you should download our SDK and compile the image by yourself to confirm CTP work well.
External Storage Config
Localisation
Remote Access
IP address
Using the board with a display
Using the terminal (open a Terminal window from the desktop), simply type hostname -I which will reveal your board IP address.
Using the board without a display
Router Device List
In a web browser navigate to your router's IP address e.g. http://192.168.3.1, which is usually printed on a label on your router; this will take you to a control panel. Then log in using your credentials, which is usually also printed on the router or sent to you in the accompanying paperwork. Browse to the list of connected devices or similar (all routers are different), and you should see some devices you recognise. Some devices are detected as PCs, tablets, phones, printers, etc. so you should recognise some and rule them out to figure out which is your board. Also note the connection type; if your board is connected with a wire there should be fewer devices to choose from.
Using your smartphone
The Fing app is a free network scanner for smartphones. It is available for Android and iOS.
Your phone and your board have to be on the same network, so connect your phone to the correct wireless network.
When you open the Fing app, touch the refresh button in the upper right-hand corner of the screen. After a few seconds you will get a list with all the devices connected to your network.
VNC
Remote access to the board's graphical interface, viewed in a window on another computer.
Installing VNC server
On your board, run the following commands to install the latest version of VNC server.
$ sudo apt-get update
$ sudo apt-get install tightvncserver
Enabling VNC server
Enable VNC Server at the command line using:
$ vncpasswd
$ tightvncserver
Enabling VNC server autostart on boot
- Create a file in /etc/init.d/, eg. tightvncserver.
$ sudo vi /etc/init.d/tightvncserver
Content is as follows:
#!/bin/sh
### BEGIN INIT INFO
# Provides:          tightvncserver
# Required-Start:    $local_fs
# Required-Stop:     $local_fs
# Default-Start:     2 3 4 5
# Default-Stop:      0 1 6
# Short-Description: Start/stop tightvncserver
### END INIT INFO

### Customize this entry
# Set the USER variable to the name of the user to start tightvncserver under
export USER='ai'
### End customization required

eval cd ~$USER

case "$1" in
  start)
    su $USER -c '/usr/bin/tightvncserver -depth 16 -geometry 800x600 :1'
    echo "Starting TightVNC server for $USER "
    ;;
  stop)
    su $USER -c '/usr/bin/tightvncserver -kill :1'
    echo "Tightvncserver stopped"
    ;;
  *)
    echo "Usage: /etc/init.d/tightvncserver {start|stop}"
    exit 1
    ;;
esac
exit 0
- Grant permission to execute the file
$ sudo chmod +x /etc/init.d/tightvncserver
- Update boot list
sudo update-rc.d tightvncserver defaults
Connecting to your board with VNC Viewer
- On your board use these instructions to discover your private IP address.
- On the device you'll use to take control, download VNC Viewer. For best results, use the compatible app from RealVNC.
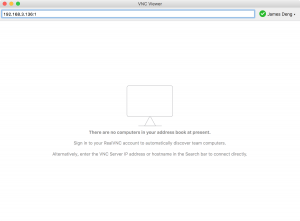
- Enter your board's private IP address into VNC Viewer:
SSH
Access the command line of the board from another computer. SSH server is enabled by default on Linbian.
Set up your connection
Make sure your board is properly set up and connected. Use these instructions to discover your private IP address.
Set up your client
SSH is built into Linux distributions and Mac OS. For Windows and mobile devices, third-party SSH clients are available.
Using Linux or Mac OS
To connect to your board from a different computer, copy and paste the following command into the terminal window but replace <IP> with the IP address of the board.
$ ssh ai@<IP>
If you receive a connection timed out error it is likely that you have entered the wrong IP address for the board.
When the connection works you will see a security/authenticity warning. Type yes to continue. You will only see this warning the first time you connect.
Next you will be prompted for the password for the ai login: the default password on Linbian is lindeni. For security reasons it is highly recommended to change the default password on the board. You should now be able to see the board prompt, which will be identical to the one found on the board itself.
Using Windows
You may need to download an SSH client. The most commonly used client is called PuTTY and can be downloaded from here.
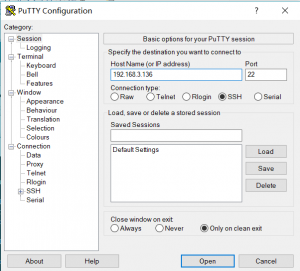
- Add your board as a host
Type the IP address of the board into the Host Name field and click the Open button.
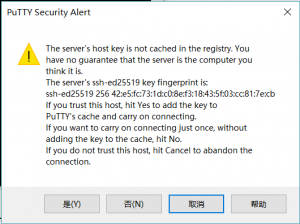
- Connect
When the connection works you will see the security warning shown below. You can safely ignore it, and click the Yes button. You will only see this warning the first time PuTTY connects to a board that it has not seen before.
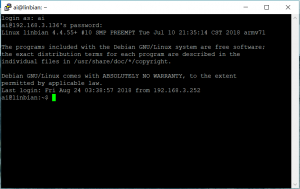
You will now see the usual login prompt. Log in with username ai and password lindeni. You should now have the board prompt which will be identical to the one found on the board itself.
SCP
Copy files between your board and another computer using SCP (Secure Copy Protocol).
Copying files to your board
Copy the file file.txt from your computer to the ai user's home folder of your board at the IP address 192.168.3.136 with the following command:
$ scp file.txt ai@192.168.3.136:~/
Copying files from your board
Copy the file file.txt from your board to the current directory on your other computer.
$ scp ai@192.168.3.136:~/file.txt .
Samba
Sharing folders to Windows-based devices.
Installing Samba
The following commmands will install all the required components for using Samba as a server or a client.
$ sudo apt-get install samba samba-common-bin smbclient
Sharing user home folder for use by windows
Adding user to Samba.
$ sudo smbpasswd -a ai
Editing Samba configuration file to tell Samba to share the user home folder.
$ sudo vim /etc/samba/smb.conf
At the end of the file, add the following to share the folder, giving the remote user read/write permissions:
[ai]
    path = /home/ai/
    available = yes
    valid users = ai
    read only = no
    browsable = yes
    public = yes
    writable = yes
