Difference between revisions of "Writing an image to the eMMC"
Csjamesdeng (talk | contribs) |
Csjamesdeng (talk | contribs) |
||
| Line 4: | Line 4: | ||
* Visit [ftp://13.57.226.143/tools/ FTP server] with user 'ftp' (password: lindeni) and download the PhoenixUSBPro (note: Windows only). | * Visit [ftp://13.57.226.143/tools/ FTP server] with user 'ftp' (password: lindeni) and download the PhoenixUSBPro (note: Windows only). | ||
* Unzip the files to a local directory. | * Unzip the files to a local directory. | ||
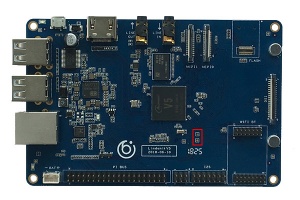
| + | * Short-circuit these two test points by tweezers or wire. | ||
| + | |||
| + | [[File:Lindenis-v5-uboot-test-point.jpg|frameless]] | ||
| + | |||
| + | * Plug the Windows PC's USB cable into the board. | ||
Revision as of 16:43, 29 August 2018
Writing the image to eMMC by PhoenixUSBPro.
- Follow this guide to install the eMMC module to the board.
- Visit FTP server with user 'ftp' (password: lindeni) and download the PhoenixUSBPro (note: Windows only).
- Unzip the files to a local directory.
- Short-circuit these two test points by tweezers or wire.
- Plug the Windows PC's USB cable into the board.
